How to Use Cat Litter Box Cleaning Mousse: Cleaning Order, Deodorizing, and Precautions
Simply topping up the litter box doesn't mean it's clean; odors and bacteria can linger at the bottom and in scratches. Regular cleaning is the key to eliminating smells. Cleaning the litter box involves more than just changing the litter; the bottom and edges need regular washing. This article outlines the steps for using cleaning mousse, deodorizing tips, and important considerations.
Simply topping up the litter box doesn't mean it's clean; odors and bacteria can linger at the bottom and in scratches. Regular cleaning is the key to eliminating smells.
Cleaning the litter box involves more than just changing the litter; the bottom and edges need regular washing. This article outlines the steps for using cleaning mousse, deodorizing tips, and important considerations.
Have you ever experienced this: you've just replaced the entire litter box with fresh litter, yet you still catch a faint "cat smell" when you walk into the bathroom? You start to doubt yourself – is the litter bad? Is the cat too smelly? Or is your nose playing tricks on you?
Don't rush to blame your feline friend. The truth is: just changing the litter isn't enough. The litter box itself is the biggest hiding spot for odors. Urine seeps into the tiny scratches on the basin walls, and over time, that ammonia smell seems to move in permanently, no matter how often you change the litter. This article will discuss how to use cleaning mousse with the correct steps to tackle odors from the root.
Key takeaways
- After use, litter boxes develop fine scratches (0.1-0.3mm deep) on the surface, allowing urea and amino acids to penetrate, form a biofilm, and continuously decompose, releasing ammonia gas and odor.
- The foam structure of cleaning mousse stays on vertical walls for 3-5 minutes to break down grime. When covering the same area, it uses about 60-70% of the amount of liquid cleaner.
- When cleaning litter boxes, use 40-45°C warm water to soften urine scale. Water temperatures exceeding 60°C may deform PP plastic material.
- Litter boxes are generally recommended to be replaced every 6-12 months. Deep cleaning frequency is once every 2 weeks for a single cat, every 10 days for two cats, and weekly for three or more cats.
Why Changing Litter Doesn't Eliminate Odors: The Basin Walls Are the Core Problem
Most cat litter boxes are made of PP plastic. The surface appears smooth, but after a few months of use, your cat's scratching will create countless tiny scratches on the basin walls and bottom. According to pet cleaning research, these scratches can be as deep as 0.1-0.3mm, which is enough for urea and amino acids in urine to penetrate, forming a stubborn biofilm.
This biofilm is the "stronghold" of odors. Even if you diligently scoop daily and change the litter weekly, it remains firmly embedded in the basin walls, continuously breaking down and producing ammonia gas. This is why your litter box becomes increasingly difficult to deodorize after six months of use – it's not the litter's problem, it's the basin's problem.
Cleaning Mousse vs. General Cleaners: Why Foam Is Better for Litter Boxes
You might think, "Can't I just scrub it with dish soap?" Of course, you can, but the effect is limited. General liquid cleaners flow away quickly after contacting the basin walls, staying for too short a time to effectively penetrate the biofilm in the scratches.
The advantage of cleaning mousse lies in its foam structure:
- Strong Adhesion: The foam can cling to vertical basin walls for 3-5 minutes without sliding off, giving the active ingredients enough time to break down dirt.
- Good Penetration: Fine foam can enter scratches and crevices, reaching dead spots that liquid cleaners can't.
- More Economical: For the same coverage area, mousse uses about 60-70% of the amount of liquid cleaner.
- Easy Rinsing: The foam structure is easily dispersed by water, leaving no chemical residue.
When choosing a cleaning mousse, remember to ensure the ingredients are pet-safe – avoid products containing phenols, formaldehyde, or artificial fragrances. Cats are extremely sensitive to smells, and overly strong chemical odors can make them refuse to use the litter box.
The Correct Five-Step Cleaning Process: The Right Order Doubles the Effect
Many people clean their litter boxes by "dumping old litter -> rinsing -> spraying something -> adding new litter." This method only removes surface dirt. Here's the complete process recommended by veterinarians and pet cleaning experts:
Step 1: Completely Empty Old Litter
Remove all the litter, including clumps stuck in the corners at the bottom. You can use an old toothbrush or a small scoop to clear out the edges. Many people skip this step, but residual old litter will affect the cleaning results.
Step 2: Initial Rinse with Warm Water
Rinse the entire litter box with warm water (40-45°C). Warm water can soften the crystallized urine scale attached to the basin walls, making subsequent cleaning more effective. Avoid using hot water; temperatures exceeding 60°C can deform PP plastic.
Step 3: Spray Cleaning Mousse and Let Sit for 3-5 Minutes
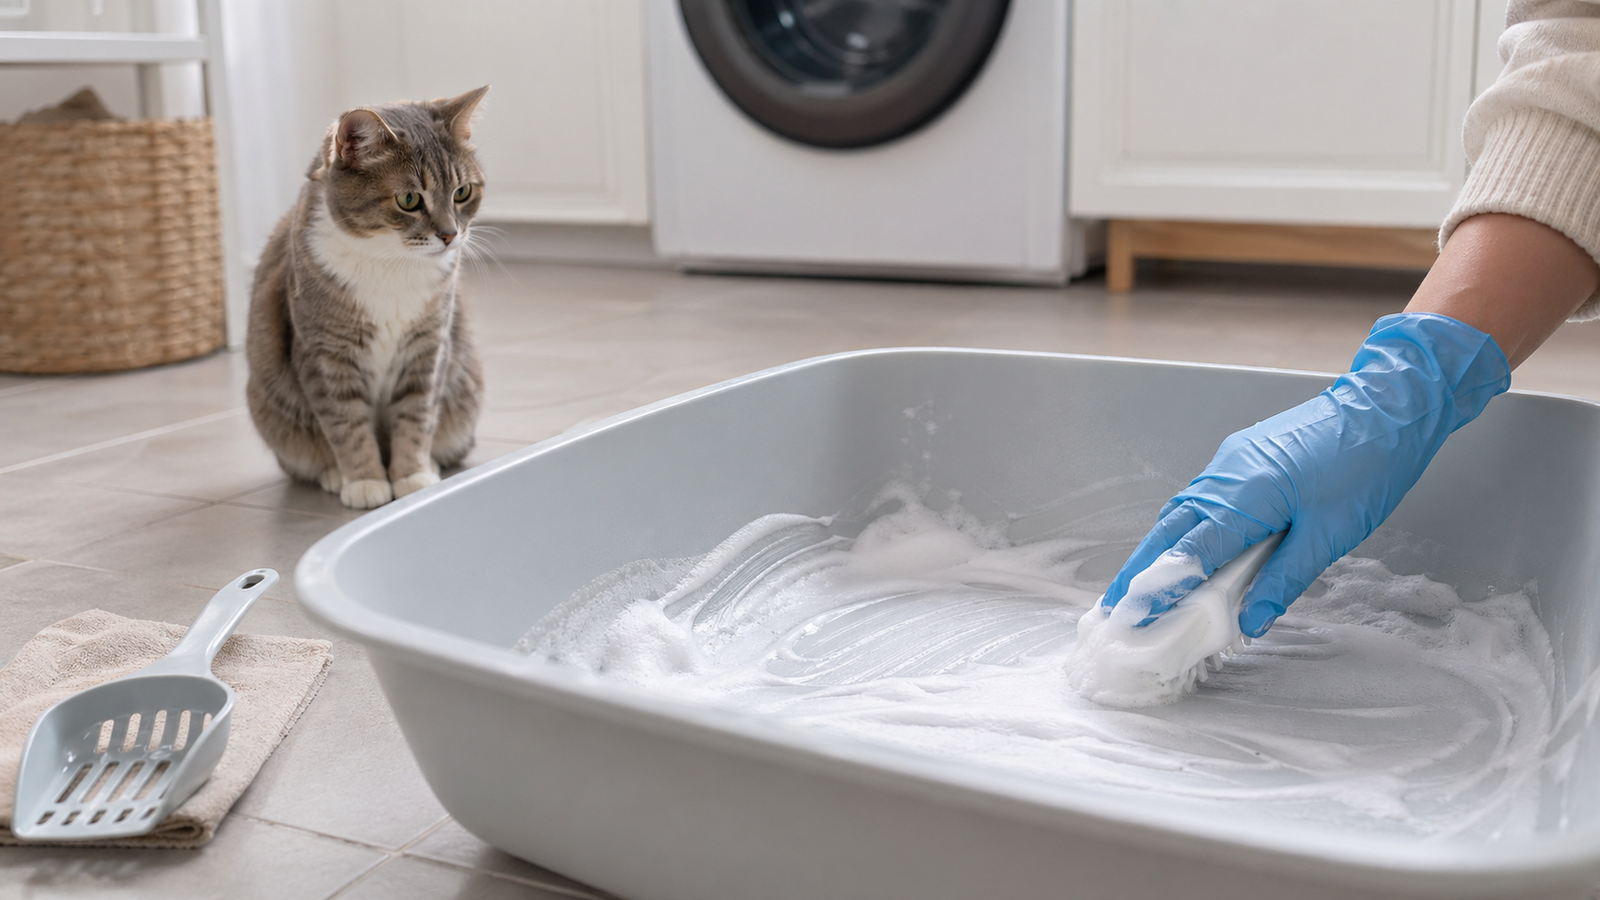
This is the most crucial step. Spray the mousse evenly on the basin walls, bottom, and rim (don't forget the parts your cat steps on). Then, let it sit for 3-5 minutes. During this time, the foam will penetrate the scratches, breaking down the biofilm and urine scale. Never scrub immediately after spraying; that would waste the mousse's biggest advantage.
Step 4: Scrub and Rinse Thoroughly
Use a soft brush to scrub in one direction (avoid back-and-forth scrubbing, which can create more scratches), paying special attention to the four corners at the bottom and the edges of the litter box. Then, rinse thoroughly with clean water at least twice to ensure no cleaning agent residue remains.
Step 5: Air Dry Completely Before Adding New Litter
This step is often overlooked! Damp basin walls will cause new litter to clump, reduce its absorbency, and promote bacterial growth. Place it in a well-ventilated area to air dry naturally for at least 30 minutes, or wipe it dry with a clean towel. Once completely dry, add the new litter.
How Often Should Deep Cleaning Be Done? Frequency Recommendations
The cleaning frequency should be adjusted based on the number of cats and litter boxes in your household:
- 1 Cat / 1-2 Litter Boxes: Deep clean every 2 weeks.
- 2 Cats / 2-3 Litter Boxes: Deep clean every 10 days.
- 3+ Cats / Multiple Litter Boxes: Deep clean weekly.
In addition to regular deep cleaning, daily maintenance is also important: scoop the litter at least twice a day and replenish new litter after each scooping to maintain a 7-10 cm litter depth. Using high-quality, stable cat litter can help extend the intervals between deep cleanings.
Litter Boxes Have a Lifespan Too: When Should You Replace Them?
Even with diligent cleaning, litter boxes need to be replaced after a certain period. It's generally recommended to replace them every 6-12 months. Signs to look for:
- The inner basin walls feel noticeably rough to the touch (scratches are too deep for cleaning mousse to fix).
- Lingering odors remain after cleaning.
- Discoloration or white crystals appear at the bottom of the basin (indicating deep urine scale penetration).
- The plastic starts to become brittle, or cracks appear along the edges.
When replacing the litter box, it's recommended to place the old and new boxes side-by-side for 3-5 days, allowing your cat to transition naturally and avoid anxiety from a sudden change.
Give Your Litter Box a Chance to "Breathe"
When caring for cats, it's often not about doing more, but about doing things the right way. Just as we wouldn't just change bedsheets without washing the mattress, cleaning the litter box requires both "surface cleaning and deep cleaning."
Next time you clean the litter box, try the complete five-step process. You might be surprised to find how fresh your bathroom can be – and your cat will likely use the litter box more frequently and comfortably. After all, who doesn't want to use a clean restroom comfortably? 🐱
If you're looking for high-quality cat litter to complement your regular cleaning routine, browse our selection to find the perfect combination for your cat.
Frequently Asked Questions FAQ
How should I safely switch cat litter or cleaning products?
It's recommended to switch gradually, keeping some old litter or familiar scents, and observe your cat for signs of holding urine, inappropriate urination, or refusing to use the litter box.
Can litter box odors be solved solely with products?
Not necessarily. Deodorizing products are only supplementary. The key is daily scooping, regular full basin cleaning, maintaining good ventilation, and using a litter type suitable for your cat.
Cat Litter and Cleaning Product Recommendations
If the problem stems from the cat litter itself, consider comparing Odor Control Mineral Litter with Ultra-Fine Tofu Litter. If odors are trapped in the litter box or floor crevices, pair it with Cat Litter Box Cleaning Mousse for regular cleaning.
CatGarden | A luxury cat-only hotel in Banqiao, offering boarding and grooming services.
Further Reading
- Mineral Litter or Tofu Litter? Comparison of Cat Litter Types, Pros, Cons, and Suitable Users
- Do Tofu Litters Get Bugs? Storage, Moisture-Proofing, Pest Control, and Cleaning Tips
- How Often to Change Cat Litter? Extending Mineral Litter Life, Deodorizing, and Cleaning Tips
\n
→ Learn more about CatGarden's Selected Litter Boxes
FAQ
Why doesn't just changing the litter completely remove the odor?
Because a cat's scratching leaves tiny scratches on the plastic basin walls. When urine seeps in, it forms a stubborn biofilm that continuously decomposes and produces ammonia gas. The root of the odor lies within the litter box itself.
What are the steps for cleaning a litter box with cleaning mousse?
The process involves completely emptying the old litter, rinsing with 40-45°C warm water, spraying the mousse and letting it sit for 3-5 minutes, scrubbing gently with the grain using a soft brush and rinsing thoroughly at least twice. Finally, air dry for over 30 minutes before adding new litter.
How often does a litter box need deep cleaning?
For one cat, deep cleaning is recommended every 2 weeks. For two cats, every 10 days. For three or more cats, weekly deep cleaning is advised.
How can I tell if a litter box needs to be replaced?
Replace the litter box when the inner walls feel noticeably rough, persistent odors remain after cleaning, the bottom shows discoloration or white crystalline urine scale, or the plastic becomes brittle or cracked.
CatGarden offers curated supplies, cat boarding, and grooming
Book services or shop online.